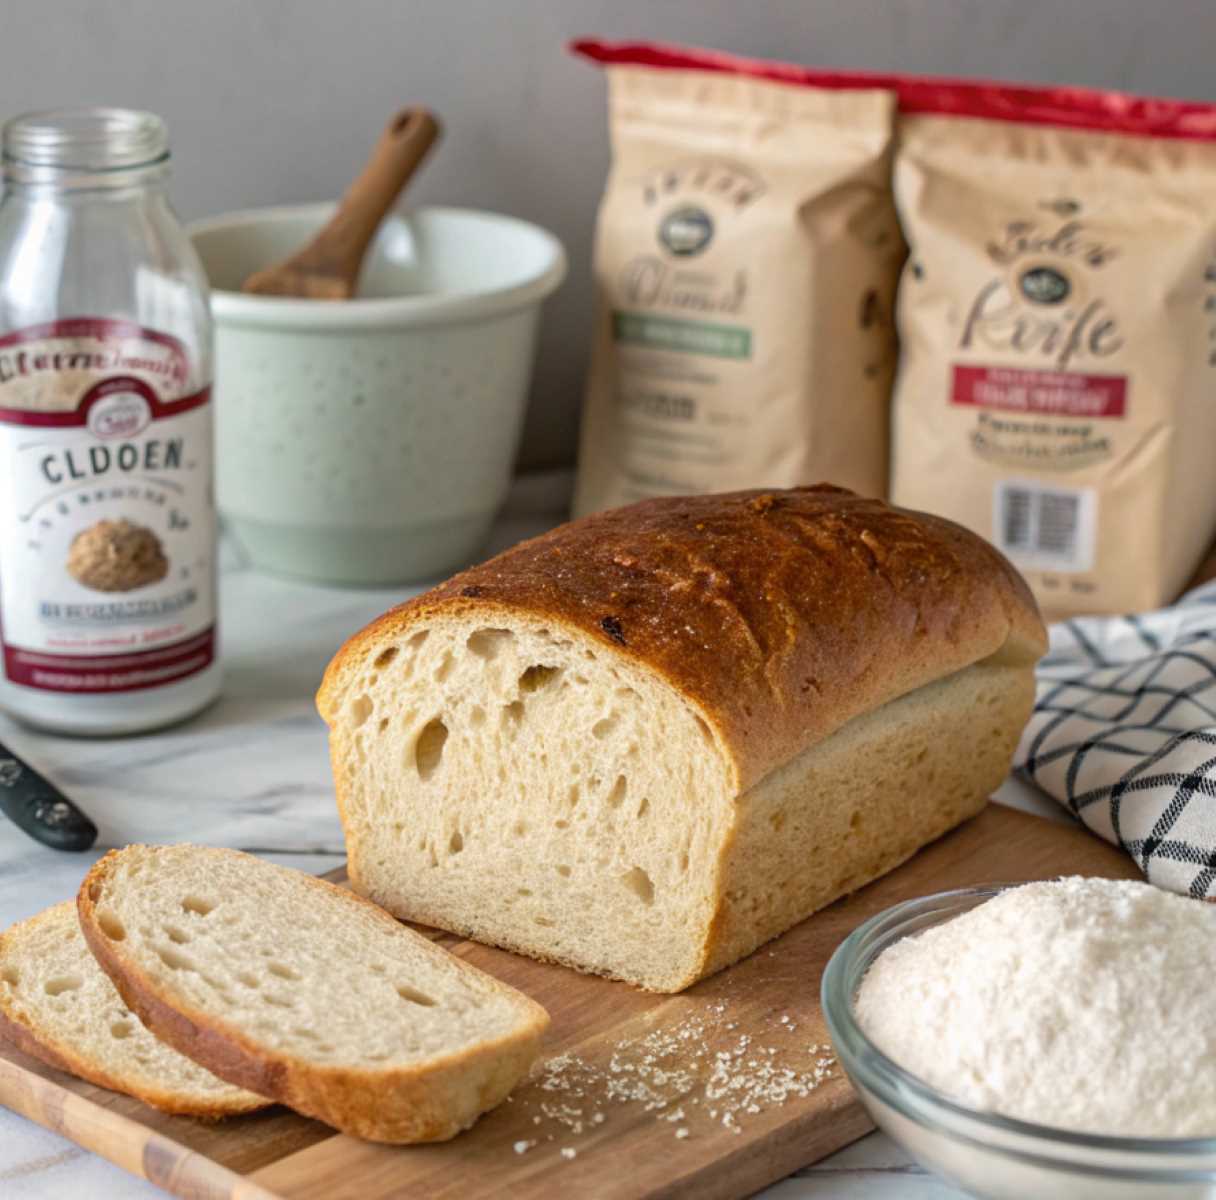
You're not alone if your gluten-free sourdough bread feels heavy or dense. Many bakers face this challenge, but you can troubleshoot and bake light, airy, gluten-free sourdough bread with the right tips and techniques.

In this guide, we’ll explore why your gluten-free sourdough bread may feel heavy and share practical solutions to improve your results. Let’s start by understanding the basics.
Jump to:
Understanding Gluten-Free Sourdough Bread
What Makes Gluten-Free Bread Different?
Gluten-free bread doesn’t rely on gluten, but the protein in wheat flour creates a stretchy network and traps air during baking. Achieving the same structure and rise without gluten is much harder, so gluten-free baking requires alternative ingredients and techniques.
Some unique challenges of gluten-free bread include:
- Lack of Structure: Gluten-free flours, like rice or almond flour, don’t create a natural elastic framework.
- Hydration Needs: Gluten-free dough needs more water to stay moist and pliable.
How Sourdough Fermentation Works in Gluten-Free Baking
Sourdough fermentation is powered by wild yeast and lactic acid bacteria, which help the dough rise and develop flavor. In gluten-free baking, this process works slightly differently:
- Leavening: The starter provides lift, but since there’s no gluten, the dough’s structure relies on starches and binders like psyllium husk or xanthan gum.
- Flavor Development: Fermentation enhances the tangy taste while breaking down complex carbohydrates, making the bread easier to digest.
Curious about whether sourdough bread is naturally gluten-free? Check out our Comprehensive Guide to Understanding and Enjoying Sourdough for detailed insights.
Common Reasons for Dense Gluten-Free Sourdough Bread
If your gluten-free sourdough bread feels heavy, it’s likely due to one (or more) common issues in the baking process. Let’s explore these potential culprits and how they affect your bread.
1. Insufficient Fermentation
Fermentation is crucial for developing air pockets and giving sourdough its light texture. It won't rise properly if the dough doesn’t ferment long enough.
Signs of Under-Proofing:
- The dough feels firm or tight rather than airy.
- The loaf has few or no visible air pockets when sliced.
Why Gluten-Free Dough Needs Extra Fermentation Time:
- Gluten-free flours absorb liquid more slowly than wheat flour, requiring more time for the fermentation process to work effectively.
- The lack of gluten makes it harder to trap gases produced by the yeast, which can result in a denser loaf.
2. Improper Flour Mix
Not all gluten-free flours are created equal. Using an unbalanced mix can lead to poor texture and a heavy loaf.
Balancing Starches and Whole Grains:
- Too much starch (e.g., tapioca, cornstarch) Creates a gummy texture.
- Too many whole grains (e.g., buckwheat, sorghum) Results in a dense, crumbly loaf.
Recommended Gluten-Free Flour Blends:
- Combine light flours (rice flour, potato starch) with heavier options (sorghum, millet).
- Add binders like xanthan gum or psyllium husk for elasticity and structure.
3. Low Hydration Levels
Hydration plays a critical role in gluten-free sourdough baking. Too little water can lead to a dense crumb.
Importance of a Wet Dough:
- Gluten-free dough is naturally sticky and looser than wheat-based dough. A well-hydrated dough allows for better fermentation and creates a softer texture.
- Aim for a hydration level of 90–100% (measured as a ratio of water to flour by weight).
Adjusting Water-to-Flour Ratios:
- Gradually add water while mixing the dough.
- Use a kitchen scale for accurate measurements instead of relying on volume.
4. Overworking the Dough
Unlike wheat dough, gluten-free dough does not benefit from kneading. Overmixing can compact the dough and make it harder for air to develop.
Why Gluten-Free Dough Doesn’t Need Kneading:
- Without gluten, the dough doesn’t form the same elastic structure that benefits from kneading.
- Overworking it can cause binders like psyllium husk to over-absorb liquid, making the dough overly dense.
Tips for Gentle Handling:
- Mix only until all ingredients are combined.
- Use a spatula or your hands to fold the dough gently during shaping.
5. Poor Baking Technique
Even a perfectly prepared dough can fall flat if your baking method isn’t optimized.
Oven Temperature Inconsistencies:
- If your oven runs too cold, the bread won’t rise properly. Use an oven thermometer to ensure the correct temperature.
- Gluten-free sourdough typically bakes best at 425–450°F (220–230°C).
Benefits of Preheating a Dutch Oven:
- A Dutch oven traps steam, essential for helping gluten-free bread rise.
- Preheating it ensures the dough gets an immediate heat boost, creating a better crust and crumb.
If you’re wondering how gluten-free sourdough compares to regular sourdough, don’t miss What You Need to Know About Gluten-Free Sourdough.
How to Fix Heavy Gluten-Free Sourdough Bread
Don’t give up if your gluten-free sourdough bread turns out too dense! Instead, you can finally achieve a lighter and more satisfying loaf with a few adjustments to your process, ingredients, and techniques. So, let’s break down some practical solutions step by step.
1. Adjusting Fermentation Times
Fermentation is a game-changer for gluten-free sourdough bread but requires precision and patience.
How to Test for Proper Proofing:
- Visual Cues: Look for a slight doming of the dough and small bubbles on the surface.
- Touch Test: Gently press the dough with your finger. If it springs back slowly, it’s ready to bake.
- Volume Check: The dough should rise by 50–75% (not double as with wheat bread).
Room Temperature vs. Refrigerator Fermentation:
- At room temperature (70–75°F or 21–24°C), proofing typically takes 4–8 hours.
- For better flavor and digestibility, use a cold fermentation in the refrigerator for 12–24 hours.
2. Improving the Flour Blend
A balanced flour mix is critical for a light and airy gluten-free sourdough.
Essential Components of a Balanced Blend:
- Starches (50–60%): Tapioca, cornstarch, or potato starch provide lightness.
- Whole-grain flours (40–50%): Sorghum, millet, or brown rice flour adds flavor and nutrients.
- Binders: Psyllium husk or xanthan gum creates structure and elasticity.
Experimenting with Additives:
- Psyllium Husk Powder: Helps mimic the texture of gluten by absorbing water and creating elasticity. Use 1–2 tablespoons per recipe.
- Xanthan Gum: A pinch goes a long way in binding the dough together, but overusing it can make the bread gummy.
3. Hydration Tips
The right hydration level is crucial for gluten-free sourdough. If it is too dry, the bread will be dense; if it is too wet, it can collapse.
Using Weight Measurements for Precision:
- Always measure ingredients by weight instead of volume. This ensures consistency and avoids over- or under-hydrating the dough.
Gradual Addition of Liquid:
- Add water slowly during mixing, especially if using flours that absorb differently, like coconut flour.
4. Baking Adjustments
Your baking method directly impacts the final texture of your sourdough.
Steam-Enhanced Baking:
- Place a shallow pan of water on the oven’s bottom rack to create steam during the first 10 minutes of baking.
- Alternatively, bake the bread in a preheated Dutch oven with the lid on for the first half of baking.
Testing for Doneness:
- Use an instant-read thermometer to check the internal temperature of the bread. A fully baked gluten-free sourdough should reach 205–210°F (96–99°C).
- Tap the bottom of the loaf—it should sound hollow if fully baked.
Looking for a reliable recipe? Try our Soft, Delicious, and Easy Gluten-Free Bread Recipe to perfect your technique.
Tools and Techniques for Perfect Gluten-Free Sourdough
Achieving bakery-quality gluten-free sourdough bread requires the right tools and techniques. These essentials can help you take your loaves from dense and heavy to light and airy.
1. Essential Equipment
Kitchen Scales:
- A kitchen scale ensures precise measurements, which is crucial for balancing gluten-free ingredients and hydration levels.
Dutch Oven:
- A preheated Dutch oven traps steam, helping your bread rise and develop a golden crust. For the best results, use one with a tight-fitting lid.
Proofing Basket (Banneton):
- While not mandatory, a proofing basket supports the dough’s shape during fermentation and enhances the crust’s appearance with ridges.
Silicone or Parchment Paper:
- Gluten-free dough is stickier than traditional dough. Silicone mats or parchment paper make transferring and baking easier.
2. Importance of Temperature Control
Ideal Fermentation Temperature:
- Gluten-free dough ferments best at 70–75°F (21–24°C). Use a proofing box or warm spot near the oven if your kitchen is cooler.
- For better flavor, cold-proof the dough in the fridge overnight (12–24 hours).
Baking Temperature and Timing:
- To boost the dough, start baking at a high temperature (425–450°F or 220–230°C).
- Gradually reduce the temperature after 20–30 minutes to avoid over-browning while ensuring the loaf cooks through.
3. Handling Gluten-Free Dough
Avoid Overmixing:
- Gluten-free dough doesn’t benefit from kneading. Overmixing can make the bread dense by compacting the dough and over-absorbing the liquid.
- Mix ingredients just until combined, then let the dough rest for 10–15 minutes to hydrate fully.
Shaping the Dough:
- Use wet or oiled hands to shape the dough, which can be sticky.
- Avoid compressing the dough too much during shaping to preserve air pockets.
4. Using a Thermometer for Accuracy
A kitchen thermometer is a secret weapon for improving your sourdough bread:
- Dough Temperature: For consistent results, keep the dough at 75–80°F (24–27°C) during fermentation.
- Final Bake: The internal temperature of a fully baked loaf should be 205–210°F (96–99°C).
5. Timing and Patience
Long Fermentation Equals Better Bread:
- Gluten-free dough benefits from extended proofing times to allow starches to hydrate and flavors to develop.
- Avoid rushing the process; a dense loaf is often the result of insufficient fermentation.
Cooling Completely:
- Let the bread cool fully before slicing. Gluten-free bread needs time to set its structure; cutting too early can produce a gummy texture.
For more tips on gluten-free baking, explore our guide on Types, Benefits, and Baking Tips for Gluten-Free Bread.
Expert Tips for Light and Airy Gluten-Free Sourdough
Creating the perfect gluten-free sourdough bread requires more than following a recipe—mastering the details. These expert tips will help you achieve a light, airy, and full-of-flavor loaf.
1. The Role of Starter Maintenance
A strong, healthy sourdough starter is the foundation of good bread. Gluten-free starters need special care to thrive.
Feeding Schedule and Consistency:
- Feed your starter every 24–48 hours if stored at room temperature or refrigerated weekly.
- To maintain consistency, feed using equal amounts of gluten-free flour (e.g., brown rice or sorghum) and water.
Signs of a Strong Starter:
- Bubbly and active with a slightly tangy aroma.
- It doubles in size within 4–6 hours of feeding.
Pro Tip: For an extra boost, add a teaspoon of honey or sugar during feeding to encourage yeast activity.
2. Testing and Tweaking Recipes
Gluten-free sourdough is all about experimentation. Keep refining your process to suit your environment and ingredients.
Keeping a Baking Journal:
- Record details like ingredient ratios, hydration levels, fermentation times, and results.
- Note any changes you make to troubleshoot dense loaves or other issues.
Learning from Small Adjustments:
- Slightly increase hydration if the dough feels too dry.
- To improve texture, swap a portion of your flour blend for lighter flours, like tapioca or potato starch.
3. Using Psyllium Husk for Elasticity
Psyllium husk is a game-changer for gluten-free bread, mimicking the elasticity of gluten.
How to Use It:
- Mix 1–2 tablespoons of psyllium husk powder into your dry ingredients.
- Psyllium forms a gel when hydrated, improving dough structure and trapping air pockets.
4. Improving Oven Spring
Oven spring—the rapid rise of bread in the oven—is crucial for an airy crumb.
Tips for Better Oven Spring:
- Use a Dutch oven or a baking stone to retain heat and encourage a stronger rise.
- Preheat your baking vessel for at least 30 minutes before placing the dough inside.
- Ensure your dough is properly proofed; over-proofed dough can collapse, while under-proofed dough won’t rise enough.
5. Don’t Skip the Autolyse Step
Autolysing (letting flour and water rest before mixing other ingredients) can enhance gluten-free dough by hydrating the starches and making them easier to handle.
How to Autolyse:
- Mix the flour and water and let it sit for 20–30 minutes before adding the starter and salt.
- This step improves the dough’s hydration and overall texture.
6. Incorporate Steam During Baking
Steam prevents the crust from forming too quickly and expands the dough.
Ways to Create Steam:
- Use a Dutch oven with a lid for the first 20–30 minutes of baking.
- Place a pan of boiling water on the oven’s bottom rack if baking on a stone or sheet.
7. Practice Patience
Gluten-free sourdough bread takes time to perfect. It is normal to start with a few dense or less-than-ideal loaves.
Mindset for Success:
- Treat each loaf as a learning opportunity.
- Adjust one variable at a time (e.g., hydration level or proofing time) to identify what works best.
The Benefits of Gluten-Free Sourdough Bread
Baking gluten-free sourdough bread isn’t just about avoiding gluten—it’s about creating a delicious loaf packed with health benefits. Whether you’re managing gluten intolerance or simply exploring new flavors, gluten-free sourdough has a lot to offer.
1. Digestive Health and Nutrient Absorption
Sourdough fermentation involves natural yeast and bacteria that improve digestion and nutrient availability.
Easier on the Digestive System:
- Fermentation breaks down complex carbohydrates, making the bread gentler on sensitive stomachs.
- Lactic acid bacteria in the starter reduce phytic acid, a compound that inhibits mineral absorption in the gut.
Better for Gluten Intolerance:
- While not suitable for those with celiac disease, gluten-free sourdough bread is often easier for people with gluten sensitivity to digest.
2. Unique Flavor and Texture
Sourdough’s tangy, rich flavor profile is unmatched, even in gluten-free versions.
Flavor Development:
- The extended fermentation process enhances the taste, giving the bread a slightly sour, complex flavor.
- Alternative flours (e.g., sorghum or teff) add unique, nutty notes.
Improved Texture:
- When done right, gluten-free sourdough has a soft crumb and crispy crust that rivals traditional sourdough bread.
3. Lower Glycemic Index
Sourdough fermentation helps slow the release of sugars into the bloodstream.
Benefits for Blood Sugar Control:
- The lactic acid in sourdough lowers its glycemic index compared to other types of bread.
- This makes it a healthier option for those managing diabetes or blood sugar levels.
4. Long Shelf Life
Sourdough bread stays fresh longer than other gluten-free bread options.
Natural Preservative Effect:
- The acids produced during fermentation inhibit mold growth, meaning your bread lasts longer without additives.
5. Customization and Creativity
Making your free sourdough allows you to experiment with flavors, textures, and ingredients.
Endless Possibilities:
- Blend different flours to create unique taste profiles.
- Add seeds, herbs, or dried fruits for variety.
Want to know which sourdough breads are safe for gluten-free diets? Read our article on The Truth and Safe Options for Gluten-Free Sourdough Bread.
FAQ
The gluten-free dough tends to be sticky because it lacks gluten structure, giving traditional dough elasticity and firmness. The high hydration level required for gluten-free recipes also contributes to stickiness.
Proofing is essential for gluten-free sourdough bread to rise and develop flavor. Skipping this step will result in a dense, flavorless loaf.
Gluten-free bread tends to dry out faster than wheat bread, so proper storage is important.
Yes, a gluten-free dough starter ensures your bread remains completely gluten-free and works well with gluten-free flour.
A lack of rise is often due to weak fermentation, improper hydration, or insufficient steam during baking.
Conclusion
Gluten-free sourdough bread may take some trial and error, but with tn, it creates a light, flavorful, and satisfying. Loaf with the right techniques, tools, and patience. Every small tweak can make a big difference, from adjusting fermentation times to perfecting flour blends. Stick with it—you’ll be amazed at what’s possible!


Leave a Reply