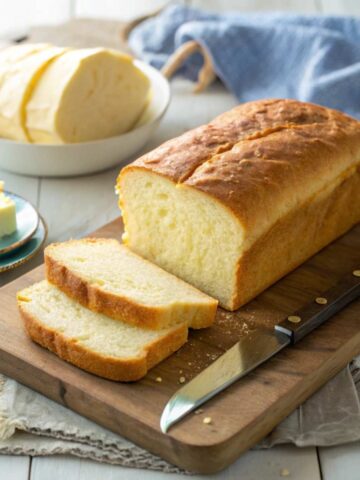
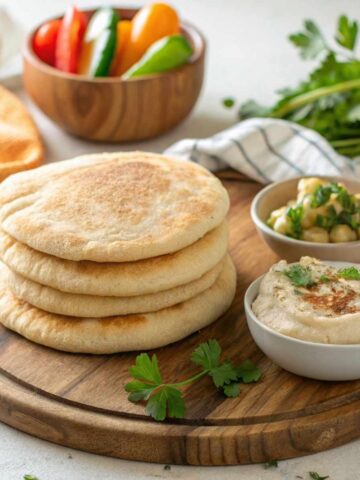
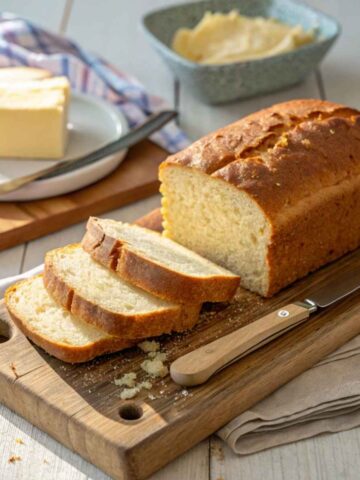
Have you ever taken a bite of something and thought, "This could use a little more crunch?" Do you know that perfect crispy topping or that bit of texture in a dish that makes it just suitable? Well, that's where Bread Crumbs step in. And if you're on a Gluten Free diet—or just exploring new ways to add flavor without the gluten—I've got some tasty tips for you. Let's talk about Gluten Free bread crumbs!
I'll walk you through what they are, why they're fantastic, and even how you can make them at home with whatever you've got lying around. Ready to dive in? Let's go!

Jump to:
- What Are Gluten Free Bread Crumbs?
- Benefits
- How to Prepare Breadcrumbs at Home
- Store-Bought
- Creative Ways to Use Bread Crumbs in Your Cooking
- Substitutes for Gluten Free Bread Crumbs
- Tips
- Common Mistakes
- Nutritional Side
- Bread Crumbs for Different Diets
- FAQs
- DIY Gluten-Free Bread Crumbs: Fast, Easy, and Delicious
What Are Gluten Free Bread Crumbs?
Alright, let's keep this straightforward. Gluten Free bread crumbs are just what they sound like—bread crumbs made from bread that doesn't have gluten. Simple, right? But don't underestimate them; they can still bring a whole lot of flavor and texture to your meals. Let's unpack this a bit more.
Gluten and Why It's a Big Deal
Gluten is that stretchy stuff in wheat, barley, and rye. Think of it as the glue that holds your bread together. For a lot of people, gluten is no problem at all. But for some, it can cause everything from tummy troubles to serious health issues. If that's you (or someone you love), going Gluten Free isn't just a trend—it's a necessity. And Gluten Free bread crumbs? They're the sidekick you never knew you needed.
Why Bother?
You might wonder, "Why switch if I don't have to?" Great question! Even if you're not gluten-sensitive, Gluten Free bread crumbs can still be a solid choice. They're often made with wholesome ingredients like almond flour, rice flour, or chickpea flour. These aren't just fancy words—these ingredients are packed with nutrients and add unique flavors that can give your dishes an extra boost.
Benefits
So, what's the big deal? Why should you make room for Gluten Free bread crumbs in your pantry? Here's the scoop:
Health Benefits
For starters, if you're avoiding gluten, these are a no-brainer. They help sidestep all those unpleasant symptoms like bloating or discomfort. But even if you're looking for something a little different, Gluten Free bread crumbs are often made from whole foods—nuts, seeds, and grains that are better for you than the overly processed stuff.
Versatility in the Kitchen
Think of Gluten Free bread crumbs as your kitchen MVP. You can use them to coat chicken, top off casseroles, or even mix them into meatballs. Basically, anywhere regular Bread Crumbs go, these guys can go, too. They're like the Swiss Army knife of Gluten Free cooking!
Easy on the Stomach
Ever finish a meal and feel like you've eaten a brick? No fun. Gluten Free bread crumbs tend to be lighter, which means you can enjoy your dinner without feeling weighed down.
How to Prepare Breadcrumbs at Home
Why buy them when you can make them? Plus, making your own Gluten Free bread crumbs is easy, cost-effective, and lets you control exactly what goes in. And if you're like me, you have a few slices of Gluten Free bread that are one step away from the trash. Don't toss them—turn them into something useful!
What You'll Need
Before we get rolling, here's the grocery list:
- Leftover Gluten Free bread (stale is excellent—don't waste it!)
- A splash of olive oil (if you want to go fancy)
- Seasonings: garlic powder, salt, pepper, or any herbs you like (because plain crumbs are bland)
Step-by-Step Instructions
Step 1: Choose Your Bread Wisely
Any Gluten Free bread will work but think about the flavor you want. A simple white loaf will give you neutral crumbs, while a multigrain bread can add a little something extra.

Step 2: Prep Your Bread
Cut your bread into small, bite-sized cubes. About 1-inch pieces should do the trick if your bread is already stale, perfect! If not, leave on the counter for a few hours. The drier it is, the better it'll crumble.

Step 3: Bake or Air Dry
Arrange the bread cubes on a baking sheet. Give them some space—crowded bread cubes don't dry out evenly. Bake them at 300°F (150°C) for about 15-20 minutes. Check them halfway through, give them a little stir, and let them crisp up nicely. No rush? Just let them air dry overnight and cover them with a clean kitchen towel.

Step 4: Make Those Crumbs!
Here comes the fun part. Once the cubes are dry and crunchy (imagine a crouton), toss them into a food processor. Pulsate several times until the desired texture is achieved. Want fine crumbs? Pulse away! Want some chunky bits? Just a few taps should do it. And there you go—your very own Gluten Free bread crumbs!
Storing Your Homemade Gluten Free Bread Crumbs
Do you have more crumbs than you need? No worries! Store them in an airtight container, and they'll be good for about two weeks. Want them to last longer? Pop them in the freezer, and you're set for up to three months. Thaw when needed, and you're back in business!
Store-Bought
I get it—sometimes you don't feel like making things from scratch. That's okay! There are plenty of fantastic store-bought options out there.
Top Brands to Check Out
A few go-to brands are Aleia's, Schär, and Kikkoman. They've got options ranging from plain to Italian-seasoned varieties, so you've got choices depending on what you're cooking up.
What to Keep an Eye On When Buying
When you're browsing for Gluten Free bread crumbs, always check the labels. You want to avoid any unnecessary additives or fillers.
Check Those Ingredients
Some sneaky brands might throw in a bit of barley malt or another gluten ingredient. Make sure you're picking the real deal!
Think About Texture and Flavor
Do you like a fine crumb or something with a bit more bite? Different textures and flavors exist, so pick what fits your dish.
Pros and Cons of Going Store-Bought
Store-bought is convenient—no denying that! But sometimes, they can be pricier and have preservatives. If you're looking for the cleanest option, homemade is still your best bet.
Creative Ways to Use Bread Crumbs in Your Cooking
Now that you've got your Gluten Free bread crumbs, how about we get cooking?
Perfect as a Coating for Fried or Baked Foods
You can go right using bread crumbs to coat chicken, fish, or even veggies. They add that perfect crunch.
Quick Recipe Idea: Gluten Free Breaded Chicken
Mix up your Gluten Free bread crumbs with salt, pepper, garlic powder, and a little paprika. Dip your chicken in beaten eggs, coat them in the crumbs, and bake at 375°F (190°C) for about 25 minutes. Golden, crispy, and delicious!
A Tasty Topping for Casseroles and Salads
Sprinkle them over casseroles, or use them as a crunchy salad topping. Think of it as your Gluten Free answer to croutons!
Add Them to Stuffing and Meatloaf
Mixing these crumbs into stuffing or meatloaf helps bind everything together and adds a nice bit of texture. You'll notice the difference!
Substitutes for Gluten Free Bread Crumbs
No Gluten Free bread crumbs in sight? Don't stress—there are plenty of substitutes that work just as well.
Try These Alternatives
Cornflakes
Crushed Gluten Free cornflakes are a fantastic substitute for that crunch factor.
Nuts and Seeds
Grind up some almonds, pecans, or sunflower seeds for a nutty twist in your dishes.
Rice Crackers
Rice crackers in a food processor make for a light and crispy substitute. They're great for Asian-inspired meals!
Tips
Let's make those crumbs taste even better!
Seasoning Ideas
Go beyond the basics. Think dried herbs, a sprinkle of parmesan, or even some lemon zest for a bit of zing.
Texture Tweaks for Different Recipes
Mixing Gluten Free bread crumbs with a bit of cornmeal or Gluten Free panko can add extra crunch. Your taste buds will thank you!
Common Mistakes
Keep these in mind to get the best out of your bread crumbs:
Crowding the Baking Sheet
When drying out your bread, don't crowd it. Spread them out so they get nice and crispy.
Not Enough Seasoning
Gluten Free bread can sometimes be a bit bland, so go heavy on those spices!
Nutritional Side
Curious about nutrition? Let's break it down:
Calorie Content
The calories can vary, especially if you're using something like almond flour. Generally, they're lighter than traditional bread crumbs.
Macros: Protein, Carbs, and Fats
If you're using almond flour or other nut-based crumbs, you'll get more protein and healthy fats. Always a good bonus!
Bread Crumbs for Different Diets
No matter your diet, there's a Gluten Free breadcrumb option that'll work for you!
Low-Carb or Keto? No Problem!
Almond flour or even crushed pork rinds can make a great low-carb substitute.
Vegan and Dairy-Free Options
Most Gluten Free bread crumbs are vegan-friendly, but always double-check to be sure!
And there you have it—a complete rundown on Gluten Free bread crumbs! Whether you decide to make them from scratch or buy them at the store, they're a fantastic addition to any kitchen. Light, versatile, and Gluten Free—they're perfect for everyone. So go ahead, give them a try, and see how they can elevate your cooking game!
FAQs
Store them in an airtight container in a cool, dry place, or freeze them for a longer shelf life.
Yes, they work well in both savory and some dessert recipes for added texture.
Most are, but some brands may add dairy or eggs, so check the label!
About two weeks if stored properly, or up to three months in the freezer.
Absolutely! Adding your spices and herbs can make them even more flavorful.

DIY Gluten-Free Bread Crumbs: Fast, Easy, and Delicious
- Total Time: 30 minutes
- Yield: 1 cup 1x
Description
Theseeasy-to-make gluten-free bread crumbs are perfect for adding a crunchy textureto your dishes. Whether you're coating chicken, topping casseroles, or usingthem in stuffing, these versatile crumbs will be a staple in your gluten-freekitchen.
Ingredients
- 4 slices of gluten-free bread (stale or fresh)
- 1 tablespoon olive oil (optional)
- 1/2 teaspoon garlic powder (optional)
- 1/4 teaspoon salt
- 1/4 teaspoon black pepper
- 1 teaspoon dried Italian herbs (optional)
Instructions
- Prep the Bread: Cut the gluten-free bread into 1-inch cubes. If the bread is fresh, leave the cubes out for a few hours to dry slightly. Stale bread works best.
- Toast the Bread: Preheat your oven to 300°F (150°C). Spread the bread on a baking pan in a single layer. Drizzle with olive oil if desired. Bake for 15-20 minutes, tossing halfway through, until the cubes are completely dry and golden.
- Blend into Crumbs: Allow the toasted bread cubes to cool. Place them in a food processor along with garlic powder, salt, pepper, and herbs (if using). Pulse until the desired crumb size is achieved—coarse or fine, depending on your preference.
- Store the Crumbs: Transfer the bread crumbs to an airtight container. They can be stored at room temperature for up to 2 weeks or frozen for up to 3 months.
Notes
-
- For added flavor, you can use different seasonings such as smoked paprika, dried parsley, or nutritional yeast.
- Gluten-free panko bread crumbs can be made using the same method but processed into larger crumbs.
- Prep Time: 10 minutes
- Cook Time: 20 minutes
- Category: condiment, Ingredient
- Cuisine: American, gluten-free
Nutrition
- Calories: 100
Keywords: gluten-free bread crumbs, gluten-free cooking, homemade bread crumbs


Leave a Reply