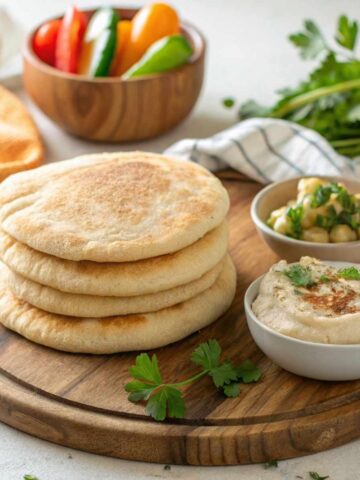
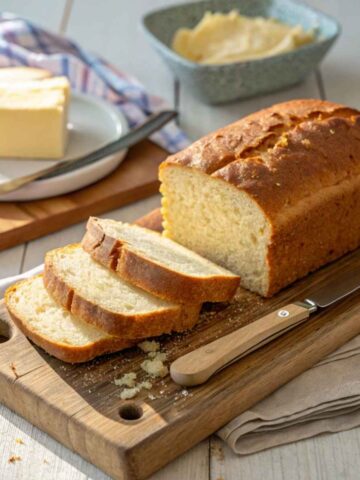
Homemade bread holds a special place in the hearts of bakers and food lovers alike, and this great gluten-free bread recipe is no exception. Its perfect balance of flavor, texture, and simplicity sets it apart. It’s soft, fluffy, and versatile for sandwiches, toast, or as a side to any meal. Made from wholesome gluten-free ingredients, this bread offers all the enjoyment of traditional bread without gluten.

Jump to:
Why Homemade Gluten Free Bread is Better Than Store-Bought
Store-bought gluten-free bread often has a hefty price tag, questionable additives, and an underwhelming texture. Baking your gluten-free bread gives you full control over the ingredients and ensures a fresher, better-tasting loaf. Plus, it’s surprisingly easy to make at home, even if you’re new to gluten-free baking. With this recipe, you’ll never look at store-bought bread the same way again.
Benefits of Gluten-Free Bread
Health Benefits of Gluten-Free Baking
Switching to gluten-free bread can be a game-changer for individuals with gluten intolerance or celiac disease. This recipe eliminates the need for wheat flour, replacing it with easier-to-digest gluten-free alternatives. Many gluten-free flours, like almond and oat flour, also offer added nutrients, making your bread delicious and healthier.
Perfect for Gluten-Intolerant and Celiac Individuals
Finding satisfying bread options can be challenging for those with dietary restrictions. This great gluten-free bread recipe ensures you don’t compromise on texture or taste. It mimics the softness and elasticity of traditional bread, making it suitable for sandwiches, toast, or any bread-based meal.
Key Ingredients in the Great Gluten-Free Bread Recipe
Choosing the Best Gluten Free Flour Blend
- All-Purpose Gluten-Free Flour Blend:
- Look for a high-quality blend that includes xanthan gum or guar gum. These help mimic the elasticity of gluten.
- Almond Flour:
- Adds moisture, flavor, and a soft crumb to the bread.
- Tapioca or Potato Starch:
- Contributes to the fluffy texture and helps bind the ingredients.
Using Xanthan Gum for Elasticity
- Why It’s Important:
- Xanthan gum is the secret to achieving a stretchy, dough-like consistency in gluten-free baking. It prevents the bread from crumbling and improves its structure.
- How Much to Use:
- Most recipes require 1–2 teaspoons of xanthan gum per cup of gluten-free flour.
Other Essential Ingredients for Perfect Texture
- Eggs or Egg Substitutes:
- Eggs add structure and moisture, but flax eggs work well as a vegan alternative.
- Apple Cider Vinegar:
- Activates the baking soda, contributing to the bread’s rise and tender crumb.
- Olive Oil:
- Keeps the bread moist and enhances its flavor.
Let’s Bake It! Step-by-Step Recipe
Ingredients List
Dry Ingredients:
- 2 ½ cups all-purpose gluten-free flour (with xanthan gum)
- ½ cup almond flour
- 1 ½ teaspoons baking powder
- ½ teaspoon baking soda
- ½ teaspoon salt
Wet Ingredients:
- 3 large eggs (or flax eggs for vegans)
- 1 cup warm water
- 3 tablespoons olive oil
- 1 teaspoon apple cider vinegar
Optional Add-Ins:
- 1 tablespoon honey or maple syrup (for a touch of sweetness)
- 1 teaspoon dried herbs (like rosemary or thyme)
Mixing and Kneading the Dough

- Combine the Dry Ingredients:
- In a large mixing bowl, whisk together the gluten-free flour, almond flour, baking powder, baking soda, and salt.
- Prepare the Wet Ingredients:
- Whisk the eggs, warm water, olive oil, and apple cider vinegar in a separate bowl until well combined.
- Mix the Dough:
- Gradually add the wet ingredients to the dry ingredients, stirring until a thick, sticky dough forms. If it’s too dry, add 1 tablespoon of water until the desired consistency is reached.
- Shape the Dough:
- Transfer the dough to a lightly floured surface. Gently knead it for 1–2 minutes to ensure everything is evenly mixed.
Baking Instructions
- Preheat the Oven:
- Preheat your oven to 350°F (175°C). Grease a 9x5-inch loaf pan or line it with parchment paper.
- Transfer the Dough to the Pan:
- Place the dough into the prepared loaf pan, smoothing the top with a spatula.
- Bake:
- Bake for 40–50 minutes or until a toothpick inserted into the center comes clean.
- Cool the Bread:
- Allow the bread to cool in the pan for 10 minutes before transferring it to a wire rack to cool completely.
Serving Suggestions
Serve your great gluten-free bread warm with butter, jam, or avocado. It’s also perfect for sandwiches or as a side for soups and salads.

Tips for Perfect Gluten-Free Bread
How to Achieve a Soft and Fluffy Texture
- Use a High-Quality Gluten Free Flour Blend:
- Opt for a blend that contains xanthan gum or guar gum. These ingredients help mimic the elasticity of gluten, giving the bread its structure and softness.
- Hydrate the Dough Properly:
- Gluten-free flours absorb more liquid than regular flours. Your dough should be slightly sticky but not too dry or crumbly.
- Incorporate Moisture-Rich Ingredients:
- Almond flour, olive oil, and eggs (or flax eggs) add moisture to the bread, preventing it from drying.
Avoiding Common Mistakes
- Skipping Xanthan Gum:
- Without xanthan gum, gluten-free bread can crumble easily. Therefore, it should always be included unless your flour blend already contains it.
- Overmixing the Dough:
- Stir the ingredients until just combined. Overmixing can make the bread dense and chewy.
- Not Preheating the Oven:
- Ensure your oven is fully preheated to the correct temperature. A hot oven helps the bread rise properly during baking.
Extra Tips for Flavor and Presentation
- Add Toppings:
- For extra texture and visual appeal, sprinkle the top of the bread with sesame seeds, sunflower seeds, or oats before baking.
- Brush with Olive Oil:
- Brushing the top of the loaf with olive oil before baking adds a golden, shiny crust.
- Use a Thermometer for Accuracy:
- For perfect results, use a food thermometer to ensure the internal temperature of the bread reaches 200°F (93°C).
Variations of Gluten-Free Bread
Herb and Garlic-Infused Bread
- Adding Herbs:
- Mix 1–2 teaspoons of dried herbs, such as rosemary, thyme, or oregano, directly into the dough for a savory twist.
- Garlic Bread:
- Add 1 teaspoon of garlic powder or minced garlic to the dough. Brush the baked bread with garlic-infused butter for extra flavor.
Sweet Bread with Cinnamon or Raisins
- Cinnamon Swirl Bread:
- Add 1 teaspoon of cinnamon and swirl 2 tablespoons of honey or maple syrup into the batter before baking.
- Raisin Bread:
- Fold in ½ cup of raisins or dried cranberries for a naturally sweet, fruity loaf.
Whole Grain Gluten Free Bread
- Using Whole Grain Flours:
- Substitute ½ cup of gluten-free flour with oat or buckwheat flour for added fiber and a nuttier flavor.
- Adding Seeds and Nuts:
- For extra texture and nutrition, fold in 1–2 tablespoons of chia seeds, flaxseeds, or chopped walnuts.
Dairy-Free and Vegan Options
- Dairy-Free:
- Replace yogurt or milk with almond milk, coconut milk, or any non-dairy alternative.
- Vegan:
- Replace eggs with flax eggs (1 tablespoon ground flaxseed + 3 tablespoons water per egg) and use maple syrup instead of honey.
Gluten-Free Rolls or Flatbread
- Make Individual Rolls:
- Divide the dough into small portions and shape them into rolls. Bake at the same temperature for 20–25 minutes.
- Flatbread:
- Roll out the dough into thin rounds and cook on a skillet for 2–3 minutes on each side, creating soft, gluten-free flatbreads.
How to Store Gluten-Free Bread
Storing at Room Temperature
- Cool Completely:
- Allow the bread to cool fully before storing it to prevent condensation, which can make the bread soggy.
- Use an Airtight Container:
- Store the bread in an airtight container or wrap it tightly in plastic to retain moisture.
- Shelf Life:
- At room temperature, gluten-free bread stays fresh for up to 2 days.
Refrigeration Tips
- Extend Freshness:
- For longer storage, keep the bread in the refrigerator. Wrap it in plastic wrap or place it in a sealed container.
- Refrigeration Shelf Life:
- Gluten-free bread can last up to 5 days in the refrigerator when stored properly.
- Reheating Instructions:
- Warm individual slices in the oven or toaster for 5–10 minutes to restore softness.
Freezing for Future Use
- Freeze Individual Slices:
- Slice the bread before freezing, layering parchment paper between each slice. Then, place the slices in a freezer-safe bag or container.
- Freeze the Whole Loaf:
- Wrap the loaf tightly in plastic wrap and then aluminum foil. Store it in a freezer-safe bag for up to 3 months.
- Thawing Instructions:
- Thaw the bread at room temperature for 1–2 hours or overnight in the refrigerator. Reheat in the oven for a freshly baked feel.
FAQs About Gluten-Free Bread
How Do I Prevent Gluten-Free Bread from Being Crumbly?
- Use Xanthan Gum:
- Ensure your recipe includes xanthan gum or guar gum to bind the ingredients and prevent crumbling.
- Hydrate the Dough Properly:
- Gluten-free flours absorb more liquid, so ensure the dough is slightly sticky to maintain moisture.
Can I Make This Recipe Dairy-Free or Vegan?
Yes!
- Dairy-Free: Use almond, coconut, or non-dairy milk instead of dairy milk.
- Vegan: Replace eggs with flax eggs (1 tablespoon flaxseed meal + 3 tablespoons water per egg).
What’s the Best Way to Toast Gluten Free Bread?
- Toasting in the Oven:
- Preheat your oven to 350°F (175°C), place slices on a baking sheet, and toast for 5–7 minutes.
- Using a Toaster:
- Toast the bread in a medium setting for a golden, crispy texture.
Can I Use Almond or Oat Flour in This Recipe?
Yes, with adjustments:
- Almond Flour: To add flavor and moisture, you can substitute up to ½ cups of all-purpose gluten-free flour for almond flour.
- Oat Flour: Replace up to ¼ cup of flour with oat flour for added fiber and a nutty taste. Ensure the oat flour is certified gluten-free.
How Long Does Homemade Gluten-Free Bread Last?
- At Room Temperature: 2 days in an airtight container.
- In the Refrigerator: Up to 5 days when properly wrapped.
- In the Freezer: Up to 3 months when stored in a freezer-safe bag.
Why This is the Great Gluten-Free Bread Recipe You Need
This great gluten-free bread recipe combines simplicity, versatility, and delicious results in one loaf. Whether you're new to gluten-free baking or an experienced baker, this recipe delivers soft, fluffy bread that rivals any traditional loaf. Its carefully chosen ingredients and easy steps ensure success every time, making it a must-have for your kitchen repertoire.
This bread is as adaptable as it is satisfying. It is perfect for sandwiches, toast, soups, and salads. Plus, it is available in vegan and dairy-free options, allowing you to customize it to suit various dietary needs.
Try this recipe today and experience the joy of baking your gluten-free bread at home. With its unbeatable flavor and texture, it’s bound to become a favorite for everyone at the table.
Looking for more delicious gluten free recipes?
Best Gluten Free Bread Recipe: Soft, Delicious, and Easy to Make
Gluten Free Bread Recipe: Soft, Delicious, and Easy to Make
Gluten-Free Bread Explained: Types, Benefits, and Baking Tips


Leave a Reply